-

Airfix 1/72 scale Consolidated B-24H Liberator plastic model kit review
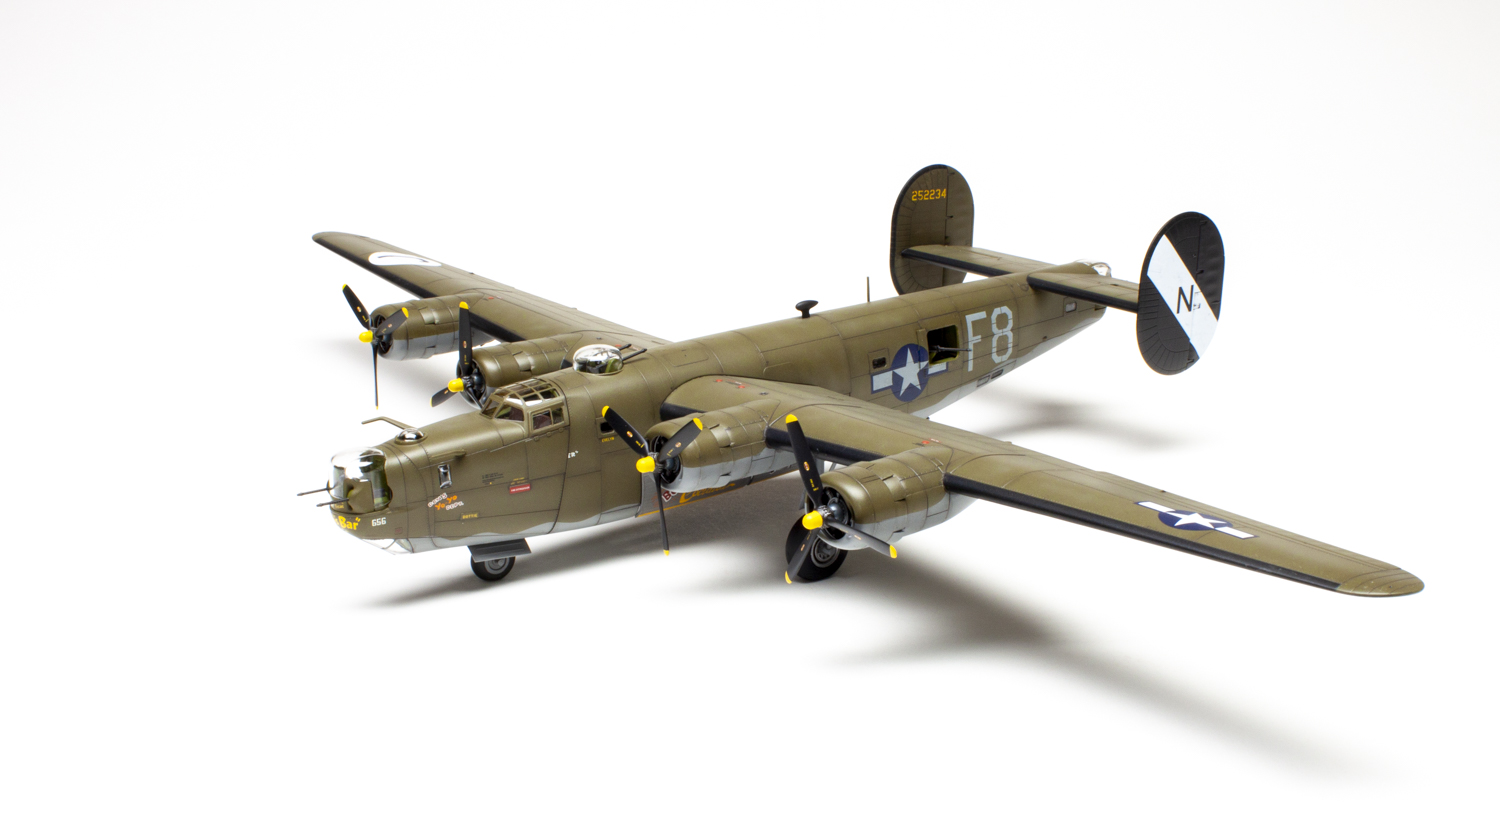
With around 18,500 units built, the B-24 Liberator holds the record for the most produced bomber. Designed by Consolidated Aircraft, the Liberator featured a high aspect-ratio Davis wing which reduced drag giving it a high cruising speed and extended range. Because of its range, it was very successful in the Pacific Theater and helped patrol the Atlantic against U-boats.
As a model, the Liberator hasn’t been shown the same love as the B-17. Before this new Airfix 1/72 scale Consolidated B-24H Liberator plastic model kit, the most recent one was from Hasegawa almost 20 years ago. Packed inside the new box are 278 crisply molded parts with fine recessed details. The breakdown of the fuselage and some extra parts inside hint that other versions are coming, and Airfix has just announced the D model will be out later in 2025. Cartograf decals provide two marking options, both in olive over gray schemes. Instructions break the assembly into easy-to-follow steps with excellent illustrations and paint guides.
The cockpit isn’t super detailed but certainly adequate for what you will be able to see. A decal details the otherwise flat instrument panel. There are separate parts to detail the cockpit sidewalls, ammunition boxes, and bomb site. Excellent engineering provides positive fits, and Airfix thoughtfully includes a compartment to add 30 grams of ballast under the radio operators’ floor. More weight can be added behind the instrument panel.
The full interior is completely detailed from the bomb bay all the way back to the tail turret. Interior ribbing, bulkheads and floors, walkways, ammunition boxes, oxygen bottles — it’s all there. The worst part is, once it’s all assembled, you’ll only be able to see the bomb bay. I did leave all the bomb bay parts out until the final assembly because that gave me a convenient place to hold on for painting. As suggested, I left the waist guns off until the final assembly, too. I had trouble getting the ammo belts for the waist guns to look right and left them off. You can also pose the gunners’ windows closed if desired. The fuselage halves mated together perfectly and joined the nose section flawlessly.
There are two sets of vertical tail pieces, so be sure to pick the proper pair. The wings feature good detail in the main gear wells, and the flaps can be posed up or extended; the ailerons are fixed. You can also model the engines with open or closed cowl flaps. The engines themselves do the job but aren’t great.
While test fitting the wings, even with the ballast in the fuselage, the Liberator still felt tail heavy. So, I glued two half-inch nuts together and added them into each engine nacelle. Probably more than necessary, but it worked.
In another clever feat of engineering, Airfix added a small pin at the base of the main gear leg that mates with a dimple at the top of the tire. The tires are weighted, so not only does it position the tire correctly, but it also changes the loading on the gear strut and should increase its strength. We’ll see if it holds up to all the weight I put in. There is a taper to the main wheel hub as it fits into the tire, so be sure to install it from the proper side.
The last several steps deal with the different turrets. Again, hats off to Airfix for doing a fabulous job of breaking these down so any seams are along panel lines — no unsightly glue joints! The rest of the clear parts were added and masked off with the excellent mask set from Eduard (No. CX667).
I used Model Master olive drab and neutral gray for paint then added some panel shading with thinned Tamiya Smoke and highlights with Model Master Faded Olive. The decals worked flawlessly.
Airfix continues to up its game with each new kit. I’m not sure how many hours I spent on the new 1/72 scale Consolidated B-24H Liberator, but I can tell you that each one was enjoyable. The level of detail, the fit, and the engineering are all top notch. The Liberator scales out right on the money to my references and just plain looks great! Want to add a bomber to your collection? Be sure to check this one out!


-
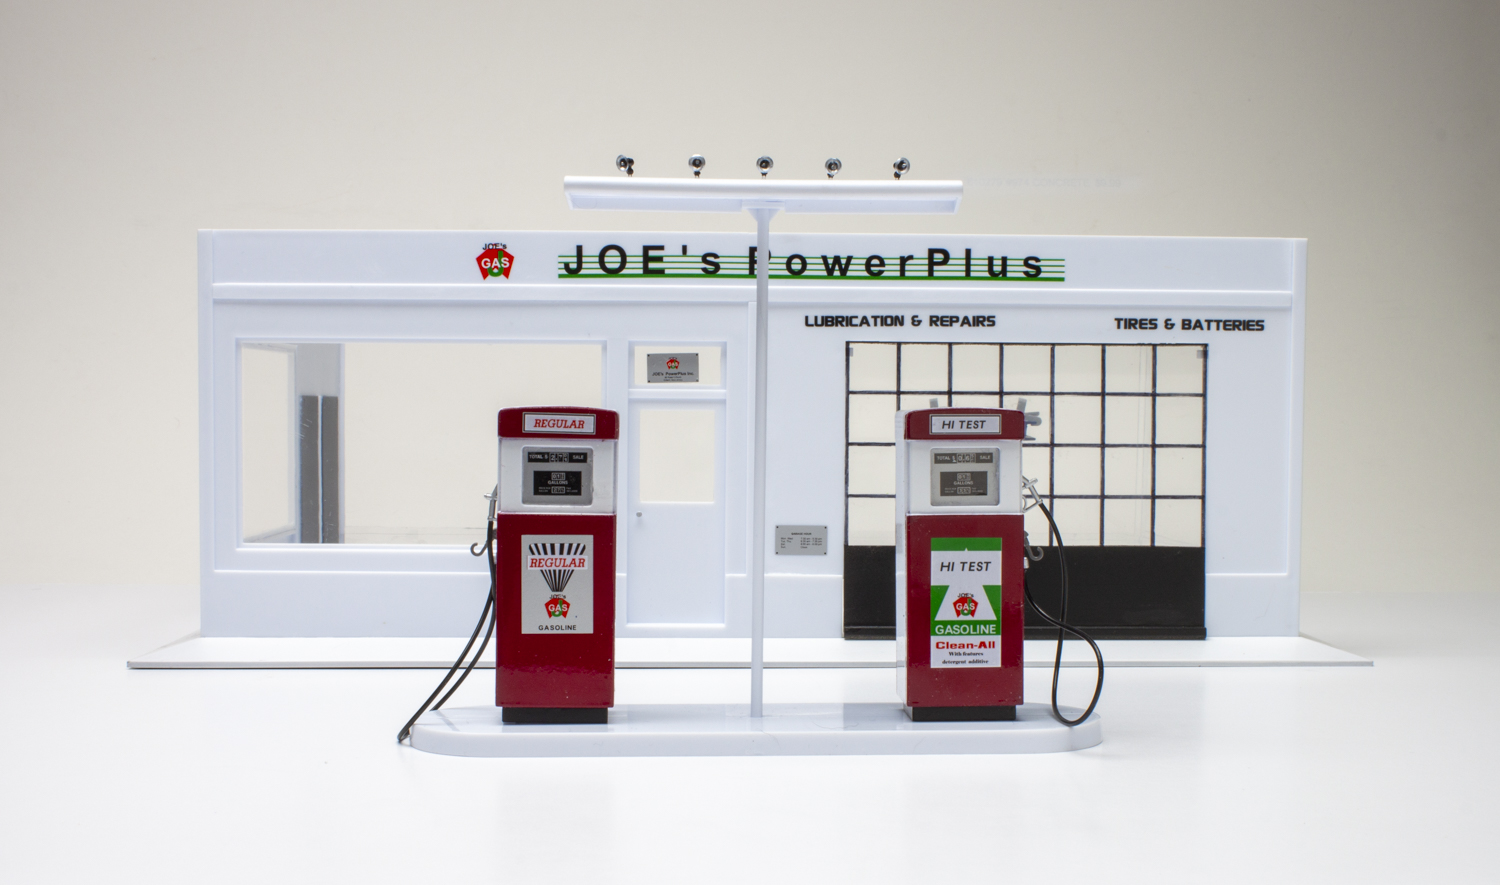
Academy 1/24 scale Joe’s Power Plus Service Station plastic model kit review
A new version of the ‘60s-style service station kit, the Academy 1/24 scale Joe’s Power Plus Service Station plastic model kit, is now available. Before this, the most recent release of the kit was in the late ’90s, and it was originally a Texaco service station.
Assembly starts with the hydraulic lift. Take your time with the delicate tire pads—each has about 15 parts. The two mounts that slide along the lift’s I-beams sit under the car tires when one is on the lift. Two shafts, two I-beams, and the center (Part A20) comprise the lift’s main section. It can only be positioned in the up position.
The single-phase air compressor with tank and motor uses a wire supplied with the kit. The instructions don’t list a numbered order of assembly, so take time to test-fit the parts before gluing.
The kit includes a number of detailed accessories, including a water can, a creeper, a four-way lug wrench, and a battery with a tray. If you plan a scene, they’ll come in handy to round it out.
The most tedious part about the service station is assembling all the oil cans and the rack. After gluing the oil can halves together, you’re left with a gap on one end and a dimple on the other. I filled the gaps with superglue. The rails that hold the cans on the rack are tricky to align. Alternate gluing them to one side and then the other to keep them level.
The nicely detailed floor jack has approximately 15 parts, building into a great rendition of something you would definitely see at a service station.
A service station wouldn’t be complete without gas pumps. The two supplied here are based on gas pumps from the 1960s and sit on the provided base. They build from four sides, a top, and a bottom. Decals and pump handles with the hoses are provided, adding to the realistic look.
The kit also includes a service station light and a sign that is decorated with decals.
The station itself comes with two walls. The side wall has two bathroom doors. The face of the building has office and garage doors. You’ll need to work them a bit to fit the base. Adding the windows and the service door brings the service station to life. Joe’s Power Plus decals and additional markings finish the outside of the building. Clear plastic closes in the back of the scene. It wouldn’t take much to make two walls to complete the service station. It also doesn’t have a roof.
Overall, the Academy 1/24 scale Joe’s Power Plus Service Station plastic model kit builds easily and could be a great way to display your models. It’ll give you a jump start for a diorama. There are so many things that you could do to make it your own. If you are looking for something different to jazz up your model car display, this would be a nice addition. And just about anyone could build it.


-

Azur-FRROM 1/72 scale Bloch MB 210 ‘Early’ plastic model kit review
French bomber design between the World Wars was … different. One of the more conventional, even handsome designs was the Bloch 210. Kitted long ago by Heller, the new Azur-Frrom 1/72 scale Bloch MB 210 ‘Early’ plastic model kit completely eclipses that offering.
Crisply molded in gray, the Bloch 210 contains top, bottom, and sides that fit perfectly together to recreate the slab-sided fuselage. A detailed interior is provided, including structures and floors in the rear compartment, and the kit handles engine detail well. There are three overall green marking options, one version sets itself apart with a slightly different exhaust arrangement provided by 3D-printed resin ends. Photo-etched (PE) parts provide numerous external control connections and a handful of other details.
Thanks to the four-sided fuselage construction, I was able to assemble the entire interior and mate the fuselage bottom and sides before painting the interior. I did leave out the seats and some other tiny details to finish separately. Once all the painting and details were completed, I added the windows and closed the top of the fuselage.
I attempted to leave off the top turret until last, but beware, the fit is so tight I snapped a small portion of the ring pushing it into place. Speaking of the turrets, a mask set would be most appreciated for completing this kit, given all the framework. I made a mistake in masking and painting the cockpit side windows, mixing them right to left. Pay close attention to the chamfers on the top edge to avoid my mistake, and you will get a perfectly fitting canopy. The two-piece “bay window” nose fits well, which was a relief.
Azur-Frrom helpfully includes a wing spar (easy to miss on the wing sprue), and the fit of the wings to the fuselage couldn’t be better. The same goes for the tail surfaces. I painted the interior of the nacelles and the portion of the wing that forms the top of the gear bay before trapping the painted landing gear legs in their mounting holes, allowing the gear to be retracted for painting. I finished the nicely molded wheels separately.
One engine nacelle shifted to the side while the glue was drying—my fault. Otherwise, they fit well after a bit of trimming to match the wing profile. The engines, cowlings, and props were finished and installed separately.
I used Tamiya Khaki (No. XF-51) to try to get the elusive “French Green” shade. The decals went on without fuss and are nicely opaque over the dark green. I spent 22 hours on the crisp Azur-Frrom 1/72 scale Bloch MB 210 ‘Early’ plastic model kit, and except for some of my own mistakes, it was a simple, enjoyable build. Hopefully, we will see some more eclectic French bombers in the future.


-
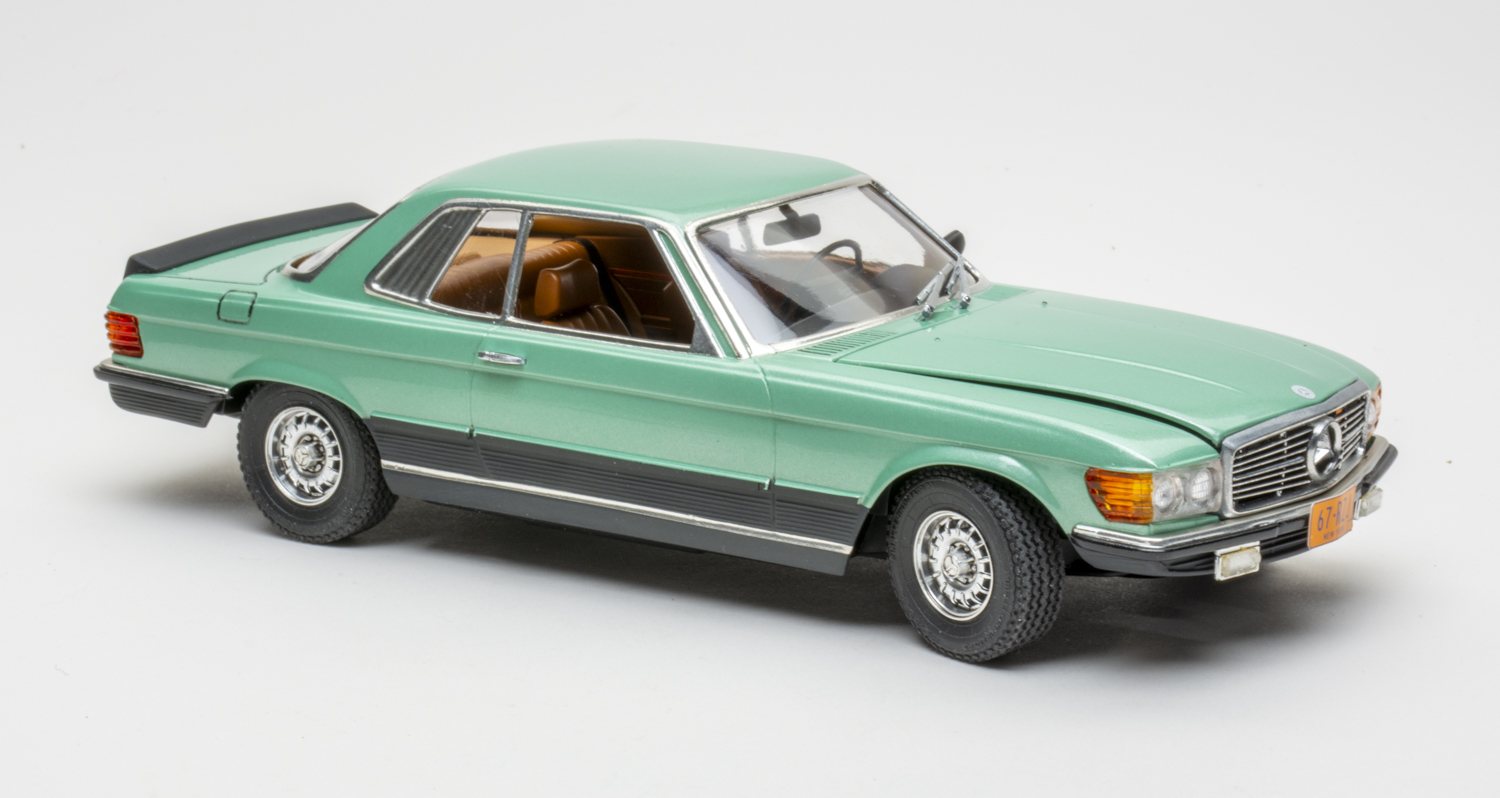
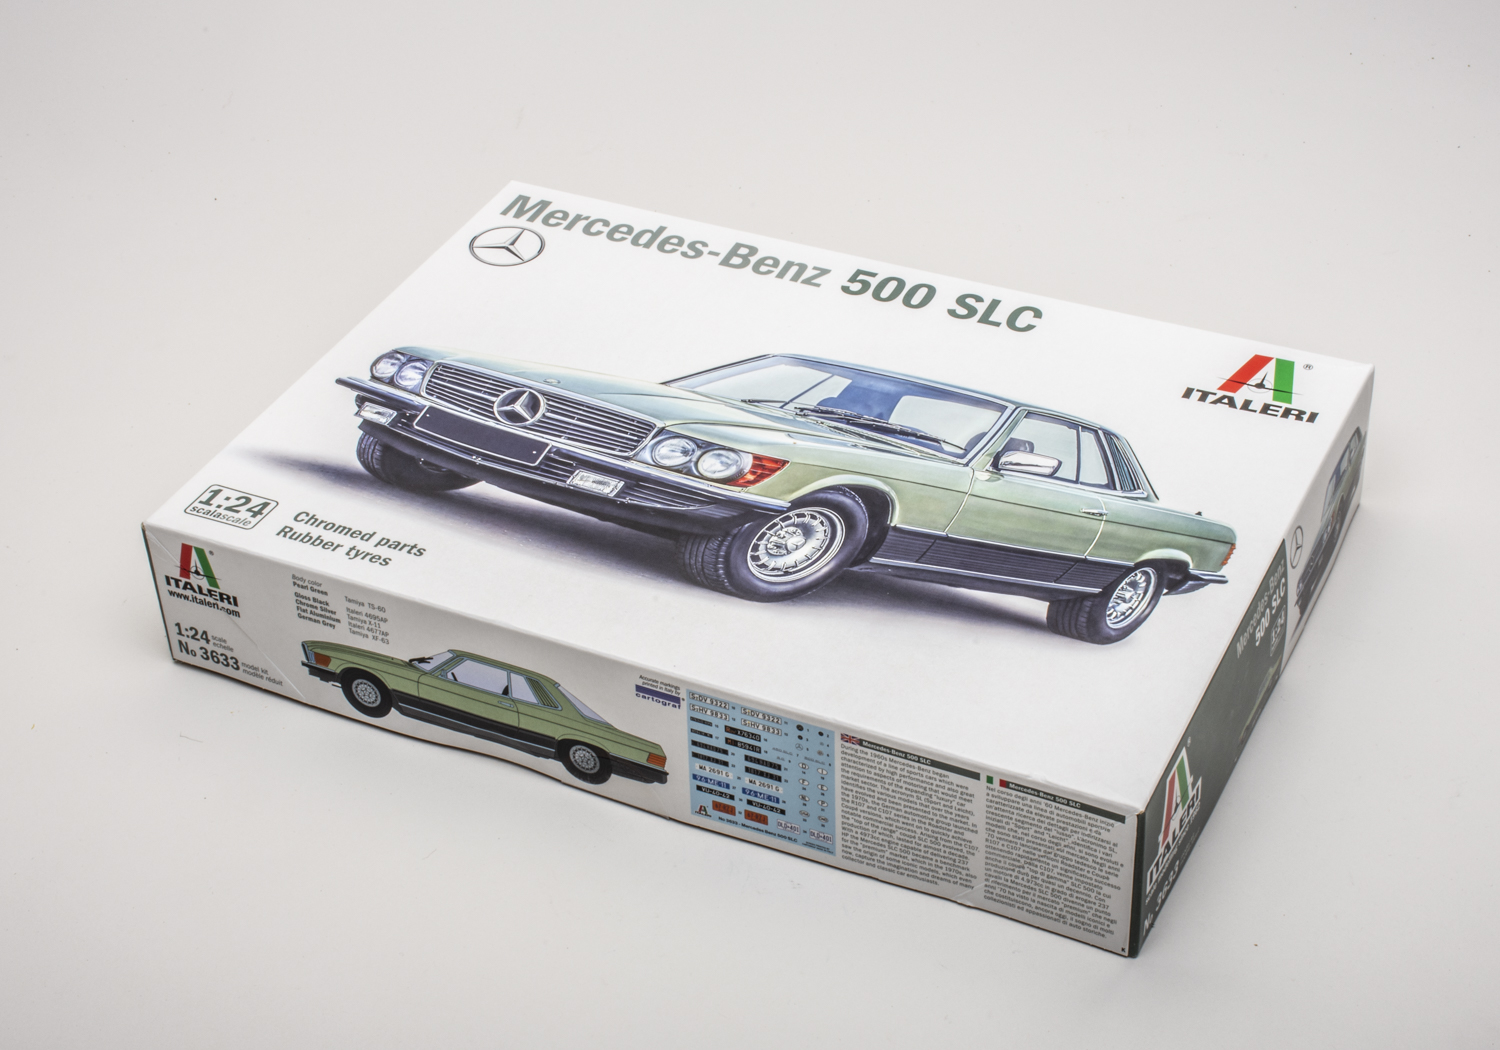
Italeri 1/24 scale Mercedes-Benz 500 SLC plastic model kit review
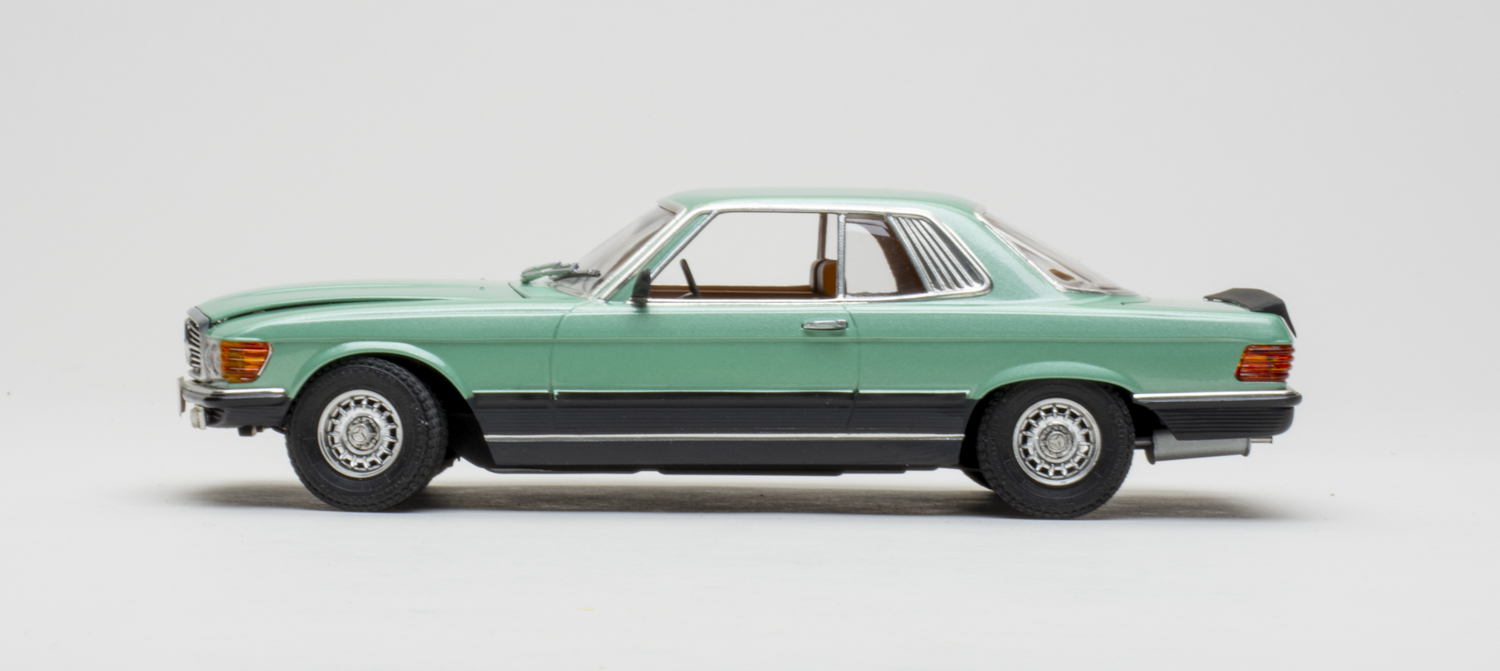
Mercedes-Benz produced the 500 SLC for only 18 months, and it was never imported to the U.S. A derivative of the famous SL line (R107 chassis), the SLC (C107 chassis) included a rear seat. The Italeri 1/24 scale Mercedes-Benz 500 SLC plastic model kit started as an ESCI tool and was re-released several times over the years by different companies.
Inside, you’ll find 78 plastic injection-molded parts, including a body in white plastic, a chrome-plated sprue, clear windows, headlights, taillights, and fog lamps. From what I could find, the double headlight bezels weren’t used on the road version of the 500 SLC, but they were on the rally car. I used them on my car because I like the look.
The body is molded as one piece, although you can cut and remove the hood easily enough. The 5-liter engine comes with all the basics and looks good despite its simplicity. A separate air cleaner, fan and fan belt, valve covers, and radiator hose complete the look, but you’ll need to clean up some flash — it is a 40-year-old tool!
The interior is basic in its appointments, with separately molded front seats and headrests, a center console, shifter, dashboard, steering wheel, and side panels. Most of the parts are adequately detailed but could do with some extra detailing to spruce things up. Beautiful Cartograf decals replicate the gauges on the dash.
The floorboards don’t have any texture — just flat and smooth. I used Faux Fabric from Scale Motorsports to simulate carpet. The center console is also flat where there should be climate controls and Becker radio.
The wheels are well-replicated and accurate, but the tires are a bit too big and wide for this kit. I suspect Italeri used the same tires on the rally version. They are passable though, with full lettering and logos.
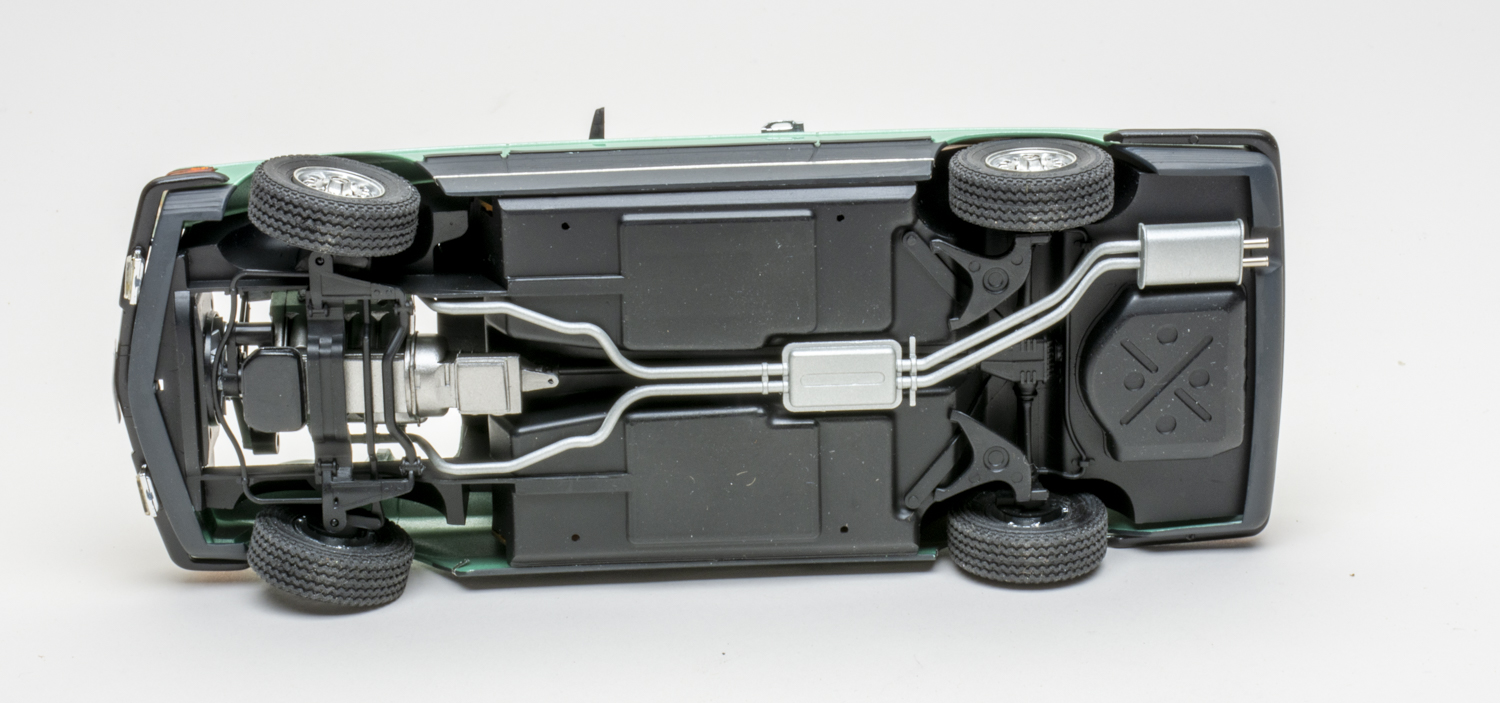
I finished my 500 SLC with Tamiya Pearl Green (No. TS-60), the only body color callout in the kit. It’s close to the real car’s 876G Cypress Green. All the other main colors are listed on the outside of the box, which is a nice touch, so you don’t have to guess what paint colors you need. Also present on the side of the box is a copy of the full decal sheet. Several European license tags are included, along with a New York and Ontario plate. No plate holder is included for the North American options. I chose the New York plates, which I’ll eventually replace with classic Wisconsin plates.
All in all, the kit went together without any issues except the wheels on the chassis. The axle spindles are too long, which results in the wheels and tires sticking out too far and interfering with the body. I trimmed and removed two spindles from the brakes. That was enough to nestle the wheels the fenders and rear quarter panels.
Also, there was an ugly sink mark on the inside of the side mirror. The front grille is a bit thick but can be cleaned up from the backside with a rotary tool.
The Italeri 1/24 scale Mercedes-Benz 500 SLC plastic model kit is simple with accurate body lines. It’s an old kit, and you’ll have to use modeling skills to clean up some parts, but it’s the only 500 SLC on the market. Out of the box, it works. With additional attention and a bit of kitbashing or scratchbuilding, a Mercedes lover could really make this kit something special. Even out of the box, it’ll look great next to other Mercedes on your shelf.


-

AMT 1/25 scale 1957 Chevy Bel Air Street Machine plastic model kit review
The AMT 1/25 scale ‘57 Chevy Bel Air plastic model kit was first released in the company’s Pro Modeler series. This most recent release can only be built as a street machine. It features an opening hood and trunk lid, plug wires (with a wiring diagram), metal foil, and revised decals.
There are 13 assembly steps in the fold-out instruction sheet. Parts are called out by number on the illustrations, but they can be difficult to decipher at times.
The nicely detailed, multipiece 454 ci engine lacks a coil—strange because it does have plug wires. The engine compartment comes complete with heater hoses. If you are not familiar with ‘57 Chevys, intake ducts (parts 80 and 81) go under the inner fenders, connecting the headlight intakes to the firewall. Make sure you install the steering box (parts 30 and 31) before the brake booster or you won’t be able to fit it in later.
The separate frame makes painting much easier, and assembling the front suspension is straightforward. Yes, you’ll find separate spindles, but they are not designed to be posable. However, the rear suspension/axle assembly is a different matter. Out back is a four-link design with individual components, and mounting and aligning proved challenging.
I deviated from the instructions and put the separate multipiece dual exhausts together into a single assembly. Doing it this way requires you to mount the exhaust to the frame as you glue the frame to the underbody. There is no gas tank, but a fuel cell mounts in the trunk.
Vinyl tires wrap around two-piece rims, and a mounting hub with calipers is trapped between the wheel halves. These hubs are keyed to the axles. Because I mounted the front spindles in the lowered position, I needed to round out the hubs so the calipers sat correctly.
The platform-style interior comes with well-detailed separate door panels, seats, and a dash. The kit provides decals for the dash. The door panels extend into the back to make the trunk walls. The seats have molded fabric for their inserts but no decals. Clear front, rear, and vent glass are all separate parts and fit well.
Watch for inner and outer sink marks around the taillights and at the end of the fins on the otherwise well-molded body. I had to add a thin styrene strip to the rear of the hood to tighten the gap. The hood also has a low spot running fender to fender towards the front. The undersides of both the hood and trunk lid have molded detail. Optional hinges are supplied if you choose to pose these open.
The decal sheet consists of scallops, emblems, and license plates. If you plan to use the scallops, I recommend sanding off the molded emblems and filling the V’s indents on the hood and trunk lid. I tried to place Decal 1 — the long body decal on the passenger side — as one piece. It curled, twisted, and rolled up. Fifteen minutes and a lot of water later it was positioned with just a little damage. Learning my lesson, I cut the corresponding decal for the other side into three sections. Much easier! As a whole, the decals performed well and released quickly with warm water.
The kit included a sheet of chrome foil. I tried using it, but it lacked self-adhesive, so I set it aside.
You can’t go wrong with a 1957 Chevy. It’s a popular car and, therefore, a popular subject for kits. The new AMT 1/25 scale ’57 Chevy Bel Air Street Machine plastic model kit hits that nostalgia but brings a twist. Having a relatively high parts count and some fiddly assemblies, I recommend it for builders with some experience, especially if you choose to use the scallop decals.


-

Tamiya 1/48 scale U.S. Light Tank M5A1 Stuart plastic model kit review
Developed from the M3 Stuart, the M5A1 featured dual Cadillac V8s with automatic transmissions instead of its predecessor’s radial engine. Approximately 6,800 were built, and they served from Operation Torch through the end of World War II.
Supplied in a box with beautiful cover art, the four olive drab plastic sprues in Tamiya’s 1/48 scale U.S. Light Tank M5A1 Stuart plastic tank kit feature perfectly molded parts with no sink marks and only a hint of ejector-pin marks that will be all but indiscernible on the finished model. Slide molding provides hollow gun muzzles.
Other features include easy-to-assemble link-and-length tracks with appropriate sag. Tabs on the return rollers start the track assembly, um, on-track, and the instructions indicate a numbered sequence to build them. Polycaps in the drive sprockets help align the last track sections. Stick with the instructions and wait to add the hull top after installing the tracks.
Before gluing the hull in place, paint the inside flat black to hide the barren interior through the open-top hatch. I finished most of the painting and decaling in Step 18 to avoid breaking off the machine gun during handline. The kit provides two schemes from the 33rd Armored Regiment in France, during July 1944 and the well-printed decal settled over details with help from Solvaset decals solution.
I followed the painting instructions and used a combination of Tamiya acrylic and lacquer paints. Weathering was done with a combination of Tamiya panel wash, pigments, and acrylic paint pencils.
With trepidation, I tackled the beautifully sculpted figure included—it was my first figure—painting it exactly as the instructions showed and using the indicated colors. I brushed on AK Interactive Wash for German Dark Yellow, let it dry, and cleaned off the high spots with a cotton swab lightly dampened with mineral spirits to emphasize details.
This is Tamiya’s 106th kit in its 1/48 scale armor range and it’s another winner. The Tamiya 1/48 scale U.S. Light Tank M5A1 Stuart plastic model kit is great value for the money and would be a great kit for a beginner, but experienced builders will also enjoy the build and weathering process, and the included figure is wonderful. Sure, you could button up the hull, but give the figure a shot before you do.


-

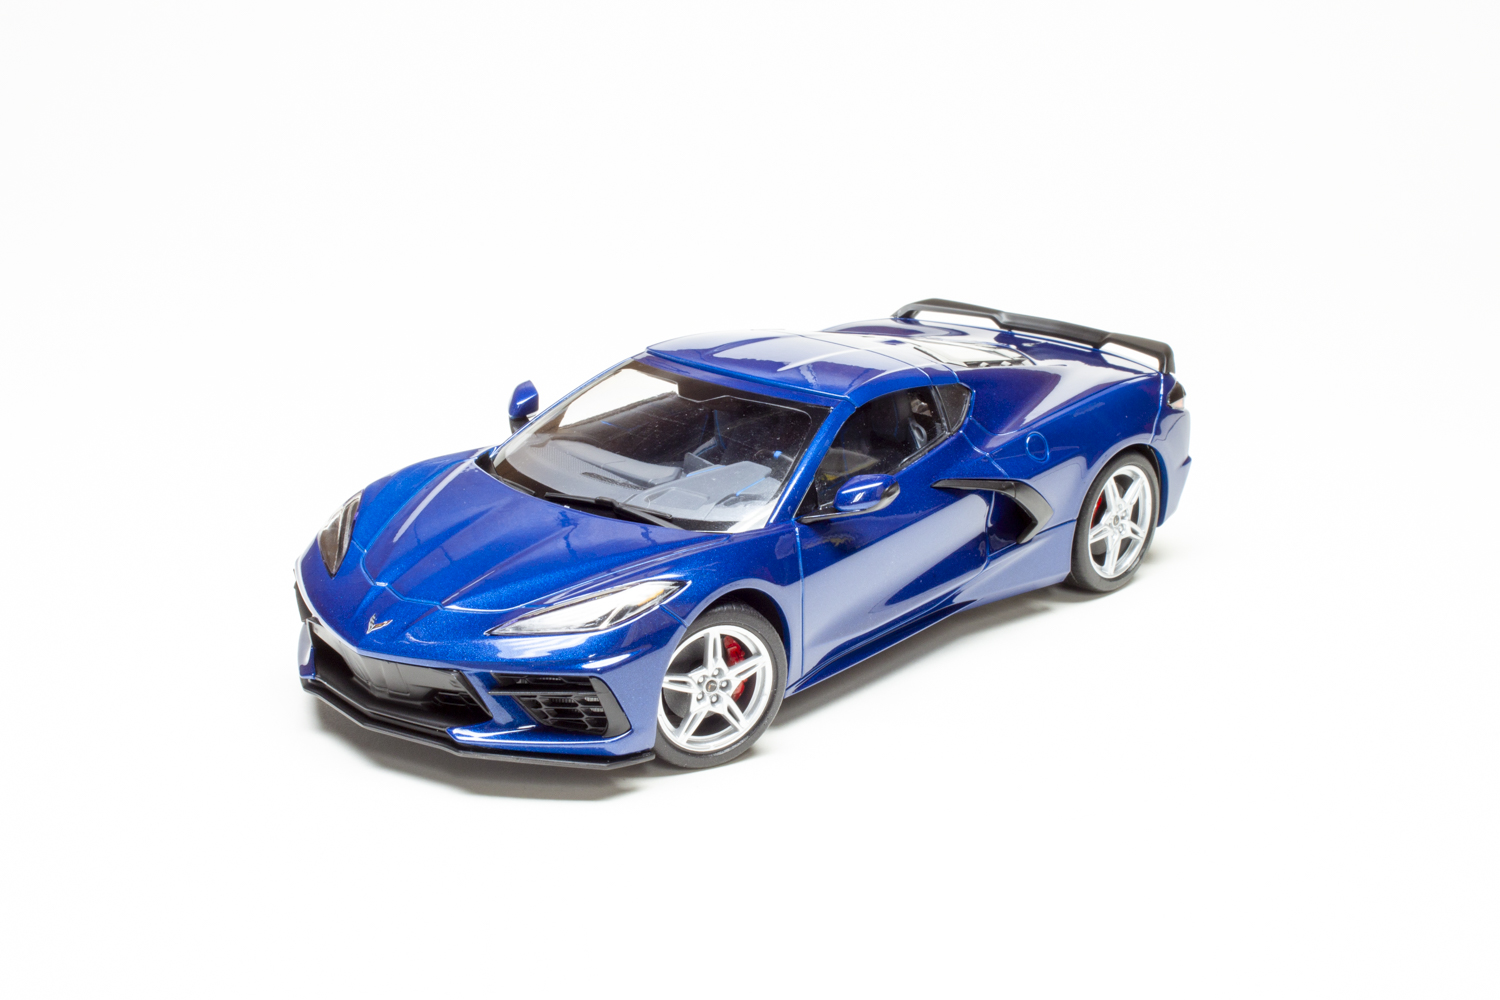
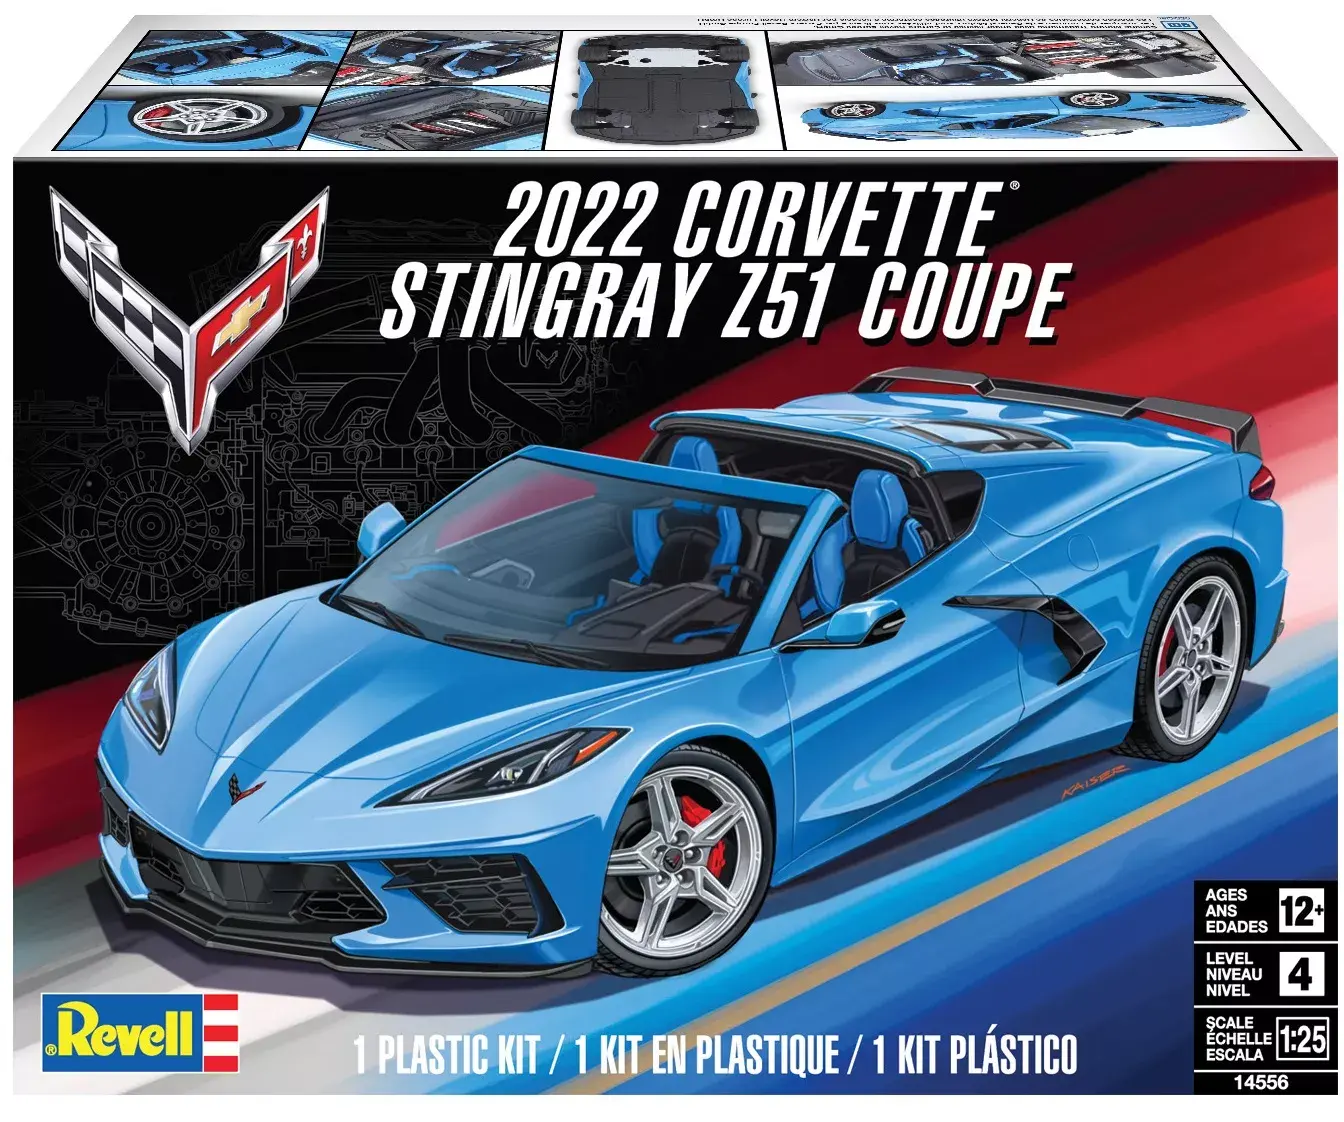
Revell 1/25 scale 2022 Corvette Stingray Z51 Coupe plastic model kit review
The Corvette, introduced in 1953, is one of the longest-running model names in Chevy’s lineup, second only to the Suburban. It is also probably one of the only cars where you can build almost every model year in kit form. Now in its eighth generation, the Corvette has broken away from the traditional front engine-rear drive layout to the long-anticipated mid-engine design.
The brand new Revell 1/25 scale 2022 Corvette Stingray Z51 Coupe features 144 parts molded in white with the option of building either right- or left-hand drive. The roof section is removable and the rear deck is hinged to reveal the full engine (at least what you can see). The decals supply white and black stripes, four different dash displays, and a few European and US-style license plates. (The decal sheet is apparently different in the Revell Germany boxing.) The full-color instruction booklet has 55 steps with good paint references along the way. I found it best to follow the instruction sequence closely to avoid difficulty.
The engine builds from 24 parts over the first 10 steps of assembly. The level of detail is great and the fit is good, although some parts lack positive location. For example, the exhaust headers have no locating pins to mount them to the heads, just very shallow indents. When installing the half-shafts, be sure the end with the longer mount stub goes into the transaxle or it will interfere with the wheel mount bushing. I mounted the completed engine in the chassis and proceeded to add the exhaust system. I found the headers didn’t quite mate to the heads but not enough to be noticeable when everything is buttoned up.
The first step in building the chassis is adding the tie-rod and brakes to the front spindles. It takes a healthy push to get the tie-rod snapped in, but this will be easier here than waiting until everything is assembled like I did. The brakes are one of the first things I would upgrade; the detail is pretty plain, but there are decals for the calipers to dress them up. The intake plenum and air-cleaner box are added next, along with the upper plenum. There are decal options for the upper plenum as well.
In addition to the left- and right-hand drive options, the interior has separate door panels with well-molded detail and decals for speaker grills and control panels. I chose a slightly subdued color scheme for mine using Tamiya German Grey lacquer (No. LP-27) for the base with highlights of Ammo Atom blue. Decals are provided for four different dash panel displays as well as the steering wheel and center console.
There are only very slight mold lines to clean up on the body before painting. I used Ammo Cobra RB Pearl Blue (No. A.MIG-0351). The fit of all the body panels is very good, and the black parts are all separate so the only masking required is around the engine bay and lower rear bumper. Crystal-clear glass parts finish the model, but you’ll need to paint the black borders on the windshield and rear window.
I spent somewhere between 30 to 40 hours building the Revell 1/25 scale 2022 Corvette Stingray Z51 Coupe plastic model kit. The minor problems I had were all self-inflicted and not the fault of the kit. The finished car scales out right on the money according to my references and it just looks right, too. If you’re a Corvette fan or just looking for an enjoyable build, check this one out!


-

HobbyBoss 1/48 scale U.S. B-24J Liberator plastic model kit review
Growing up, I shared a bedroom with my older brother. He had a Monogram 1/48 scale B-24J hanging from the ceiling. He took his model with him when he got his own room, so I built the same kit to replace it. Made with tube glue and corresponding fingerprints, that model is long gone. Forty-five years later, we have a newly-tooled kit of one of my favorite airplanes from HobbyBoss, a 1/48 scale B-24J Liberator plastic model kit.
When I opened the kit, my first thought was, “We’ve got trouble right here in Rivet City.” The exterior is littered with the recessed polka dots, although the petite panel lines look fantastic, and the detail on the interior parts looks soft rather than crisp and sharp. The engines are strangely shaped, and to my horror, the front and rear turrets are split straight through the center of the clear areas rather than on the natural seams.
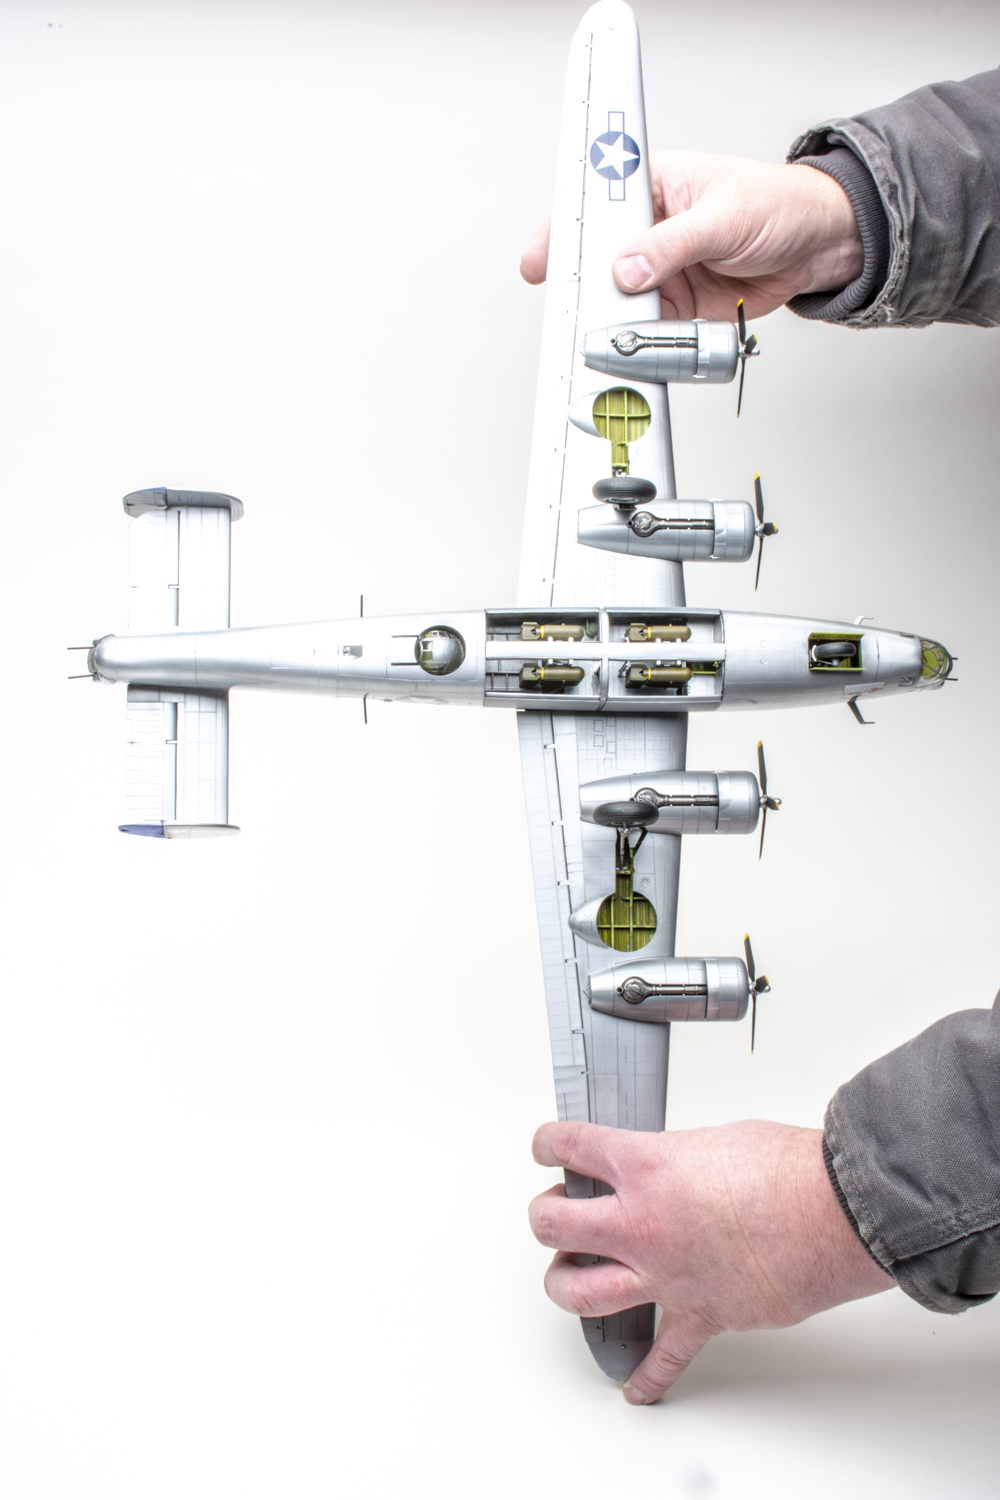
The box top notes the full interior and HobbyBoss isn’t joking. The first 17 pages of the instructions comprise just the fuselage. At first, I thought some of the details were modern additions to warbirds that still fly, but a close inspection of my references shows they were installed in combat aircraft. In Step 8, do not install the photo-etched metal (PE) detail on the sides of the bomb bay catwalk until final assembly, because they interfere with the fit of fuselage halves during test-fitting to be sure the interior is in the correct position.
The instructions show where to add nose weight on page 15, but do not indicate how much. I jumped ahead to build the wings and tail, then taped everything together to help me calculate a number. I made a small aluminum foil packet for the area behind the nose gear and added nearly 4.5 ounces of lead shot mixed with white glue. I hoped that once this dried, I would be able to remove it and paint the foil, but it wouldn’t budge. In addition, no matter what I tried, there was now a gap in the lower seam between the nose gear and the bomb bay. Considerable filler was needed to make the seams acceptable.
The fit of the wings and tail was great and the flight surfaces press-fit into place without glue. The strangely shaped engines are hidden in the nacelles, and the landing gear looks good.
The level of detail inside the turrets is impressive. Though small, they are near-perfect representations of the Emerson A15, the Consolidated A6C, and the Martin A3C turrets. The exception is that the clear outer shell of the Emerson and Consolidated come in halves with the seam running down the center of the glass panes. I joined the turrets with Microscale Liquid Tape. It looks a little messy now, but with minor modifications to the turret mounts, it allows me to replace HobbyBoss’ clear parts with aftermarket ones if and when they become available.
Part of my masking sheet had not been cut correctly, with the smallest masks not being cut at all. Some of the provided masks were a poor fit, so I used a set from Eduard instead.
The extremely thin decals went down well over a coat of Alclad II Gloss. Be careful, because the decals may fold over themselves, and, if they do, they’re done. I took a few from a second kit I have for another project. Strangely, HobbyBoss provided only three prop logos on the decal sheet, but 12 are needed for all four propellers.
As I completed the final assembly, installing the tail turret, my B-24 rocked back and became a tail dragger. Because of the mods I made, I was able to remove the nose turret and add just enough weight so it sits on all three wheels. The rubber tires flex and I’m not sure the gear legs can take the strain of all that weight, but at least it’s not a tail dragger!
Despite my first impression, the HobbyBoss 1/48 scale B-24J Liberator plastic model kit grew on me. The amount of interior detail is impressive, the decals look good, and, for the most part, the fit is excellent. The finished model scales out perfectly. The biggest downsides are the clear parts split through panes and the rubber tires. With aftermarket wheels, gear legs, and turrets, HobbyBoss’ B-24 could be a showstopper!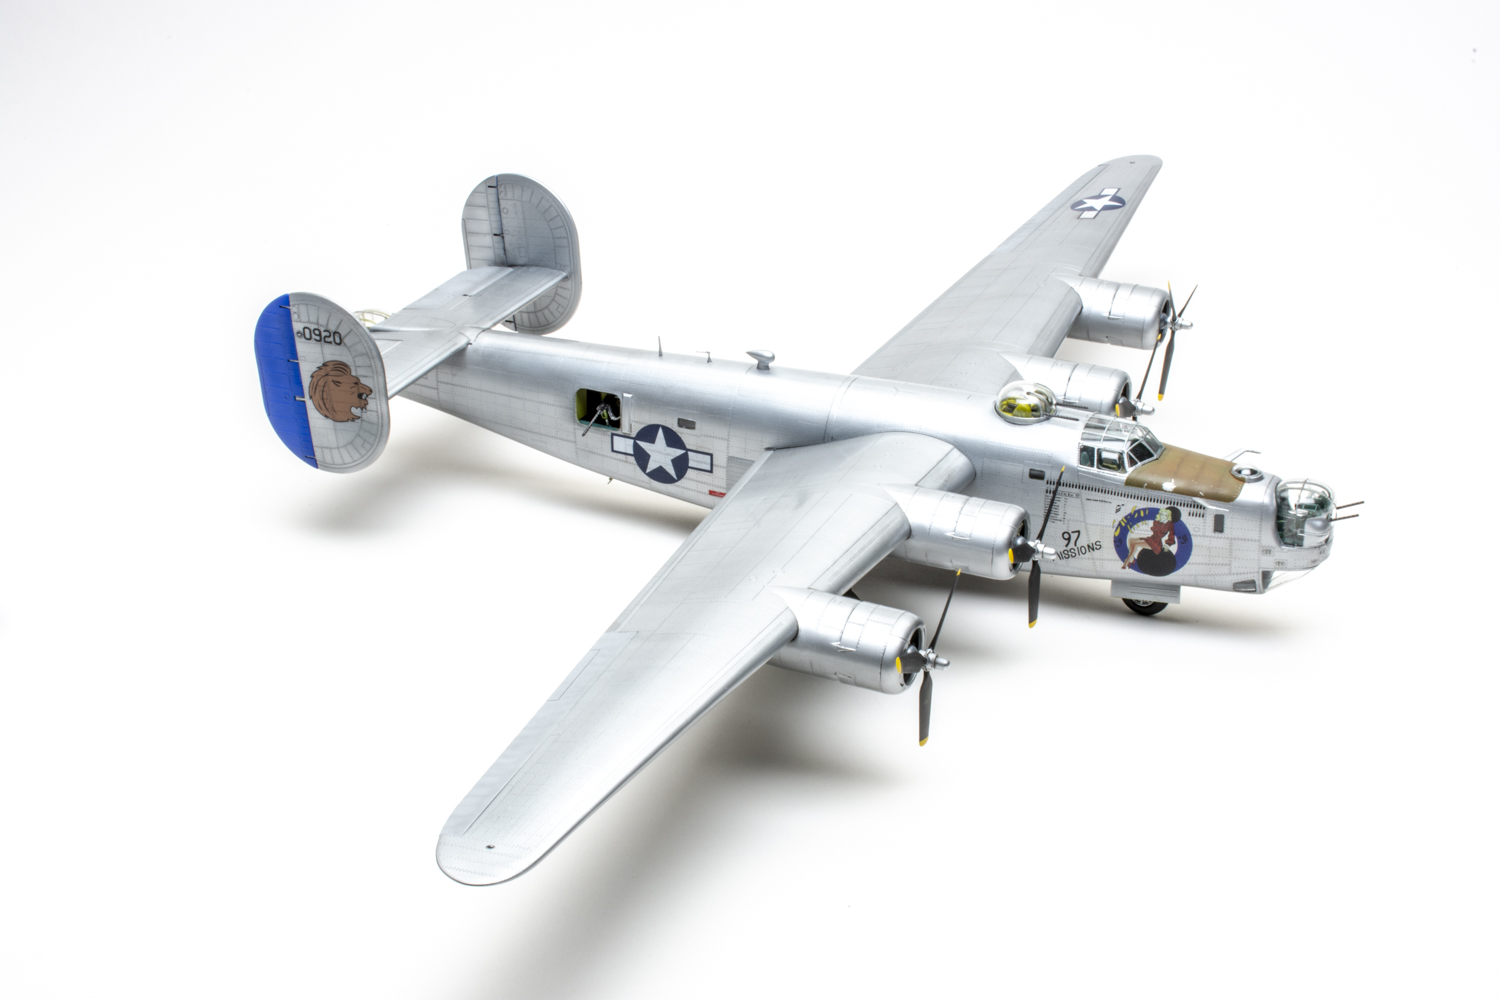


-

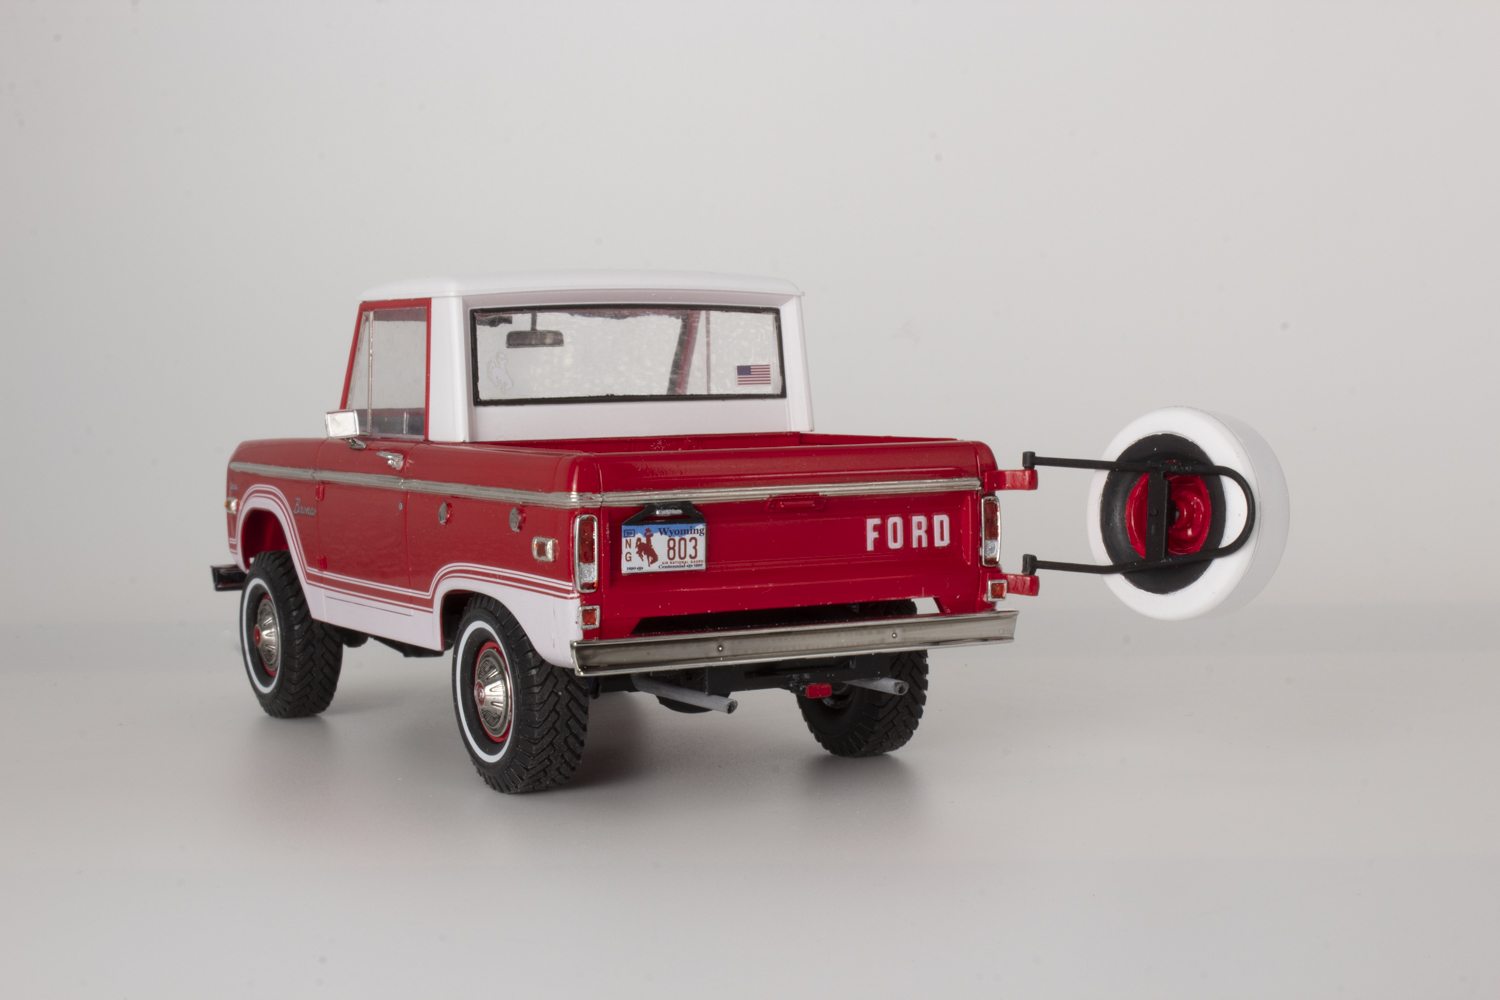
Revell 1/25 scale Ford Bronco Half Cab plastic model kit review
Another fine offering from Revell, the 1/25 scale Ford Bronco Half Cab plastic model kit represents the pickup version of the first generation Bronco and features a V8 engine, full glass, and a rear-mounted spare. The instructions include a brief history, 47 illustrated steps, parts index, and paint suggestions.
The detailed 302 V8 mounts to the separate chassis. Don’t attach the air cleaner yet because it could create a clearance issue when mounting the body. Once the engine is in place, the dual exhaust, transfer case, rear springs, and the rear axle go on. When mounting the front control arms, use the front axle to keep them aligned. Next, attach the front shocks before permanently mounting the axle. Remember to position the front and rear driveshafts before the axles are secured.
One-piece wheels press into vinyl black wall tires. The tread is directional, so pay attention when mounting them. The front wheels have Warn locking hubs molded on, so make sure these go in the front axle. The wheels mount to the axles by press-fitting metal pins. Instead, I drilled out the axles and secured them with epoxy glue. The kit offers the choice of bare steel wheels or fitting hubcaps. The body reflects an upgraded trim level, so I thought the hubcaps were appropriate. Whitewall decals are included, and they went on surprisingly well; you just need to keep them positioned correctly while the adhesive dries.
The interior of a Bronco is basic, and so is the kit. Decals for the seats and door panels reflect the upgraded trim, and there is a decal for the instrument cluster and radio. The instructions have the seats being installed at this point, but I recommend attaching the bulkhead (Part No. 202) first. Just be sure it lines up with the rear of the roof.
The dashboard needs to go on before the body is mounted on the chassis. I deviated from the instructions and rather than building the windshield, side glass, and roof on the body, I glued them together but left this subassembly separate. Now it can be removed to show the interior.
A spare tire cover and rack adorn the rear. The rack can be made movable or left off. The tire and wheel are molded to the backside of the cover, a nice touch.
The headlights and front turn signals are clear; I painted the turn signals because the clear lenses were too thick. Taillights, reflectors, and marker lamps all require paint. There are a couple of license plate decals to choose from.
Three exterior decal options are included. The side decal on the option I chose is one piece and a challenge. Flood the area with water, because the decal will need to be unfolded, straightened, and aligned after it hits the body. The good news is it is tough and, even though it’s white on a red body, it is reasonably opaque. I added all the decals before mounting the body to the frame.
This is one of the best kits I’ve built in a while. Crisp moldings and great decals, plus it goes together easily. Some decal experience will help before tackling this kit, but being a Bronco, it really doesn’t need any decals.


-

Tamiya 1/24 scale Porsche 911 GT3 RS (992) plastic model kit review
There aren’t many cars that have defined the Porsche brand more than the Porsche 911. Although the GT3 RS (992) version is vastly different and much more capable than its predecessors, the basic design and styling of its roots are still evident. The rear-mounted flat-six engine now produces 525 HP. Extensive use of carbon fiber and lightweight design give the RS outstanding performance.
Given its popularity, it’s unsurprising that the 911 has been well-represented in model kit form. Fujimi has covered most of the early models in their highly-detailed “Enthusiast” kit series and Tamiya has kitted a few, but until now, modern versions of the car have been lacking. Well, Porsche fans, your wait is over with the release of the Tamiya 1/24 scale Porsche 911 GT3 RS (992) plastic model kit! This all-new kit is what we’ve come to expect from Tamiya — exquisitely molded parts, excellent detail, and superb fit. Decals give you four color options for the GT3 RS badging and carbon fiber for the hood, roof, and wing.
The chassis is fairly basic yet well-detailed. The mostly flat floor pan has all the aero bits of the real car expertly recreated. Most of the other suspension parts are molded separately making detail painting simpler. The front wheels are posable and the brake calipers and rotors are separate so the rotors turn with the wheels.
The interior floor is marred by some light-but-visible ejector-pin marks. To cover this, I painted the semigloss black areas first, masked them off, and airbrushed flat black areas with straight Mr. Surfacer 1500 Black from about 10 inches away producing a slight texture that helped hide the marks. Porsche’s website, www.porsche.com, provides good shots of interior details. The part breakdown of the kit ensures that there isn’t a lot of masking necessary.
Decals are provided for the instrument panel, steering wheel, seat and door inserts, and speaker grills, but they require a touch of solvent to settle.
The body’s engineering makes painting and assembly a breeze. The most intricate part is probably the taillight panel, but the four-step process is clearly defined in the instructions. After primer, paint, clear coat, and sanding to remove a couple of dust bunnies, I attached the remaining parts. Ample mounting tabs on the clear parts minimize the risk of gluing mishaps. The only slightly fiddly process of the entire build was putting the rear wing together.
Tamiya continues to be at the pinnacle of model kit design with the Tamiya 1/24 scale Porsche 911 GT3 RS (992) plastic model kit. The attention to detail, how the parts assemble, and even how they’re attached to the sprues make the kit an undeniable pleasure to build. Tamiya hit another home run with this one!